An air-conditioner uses evaporator coils to cool the air and condenser coils to transfer heat outside. The former is located indoors and the latter is located within the outdoor unit. Both sets of coils accumulate dirt, oil, and debris over time, making your AC less efficient and more expensive to run. Cleaning AC coils is an essential part of HVAC maintenance, and it is a pretty straightforward, if time-consuming, task. Read the steps below to learn how to properly clean your AC coils.
If you are short on time or unsure of any steps in the process, having an HVAC technician from Galmiche and Sons take care of coil cleaning and HVAC maintenance saves you time and effort. Our HVAC technicians clean AC coils thoroughly and safely. Plus, if we spot any issues during the course of cleaning and inspection, we can recommend and carry out repairs as needed, keeping your system in peak condition.
If you’re in need of HVAC cleaning in St. Louis, call us at 314-993-1110 or schedule your HVAC maintenance appointment online.
Benefits of Cleaning AC Coils
Dirty AC coils cannot absorb or release heat as effectively, making your AC work harder to maintain the same level of indoor comfort. This can result in higher energy bills and the ensuing strain on your AC system can lead to breakdowns and costly repairs.
The dirt and debris on AC coils as well as throughout your system can create blockages and reduce the amount of air flowing through the system. Your AC can become less effective in trapping dust, pollen, pet dander, and other airborne particles. This makes regular maintenance as well as cleaning AC vents important to improve indoor air quality.
Step-By-Step Process of Cleaning AC Coils
Before you get started, make sure to collect all of the tools and equipment you will need. Tools you will need include:
- A pair of gloves
- Cordless drill
- Vacuum
- Flashlight
- Screwdriver
- Spray bottle
- Shop vac
- Fin comb
- Foam AC condenser coil cleaner
- Garden hose
Cleaning the Condenser Coils
Once you are ready to start cleaning the AC coils, here are the steps you should follow:
- Locate the AC condenser unit. A common location is near the home’s foundation. In some cases, it may be located in the attic or basement.
- Disconnect the electric breaker that controls the AC. The electric breaker is housed in a small metal box to the side of the house and connected with a cord to the condenser unit.
- Using a screwdriver, remove the top and side condenser covers. Keep the screws in a small bag.
- Unscrew the condenser fan assembly from the unit. This is a delicate step in cleaning AC coils and must be done carefully to avoid damaging the fan and motor. Alternatively, check if it is possible to remove the condenser fan assembly’s wiring harness from the unit’s wiring.
- Inspect the inside of the AC unit for issues like loose wires, corrosion, or cracked pipes. Call Galmiche and Sons to perform the necessary repairs.
- With gloves on, remove the debris (leaves, bark, dirt, mulch, and others) on the bottom of the metal cabinet.
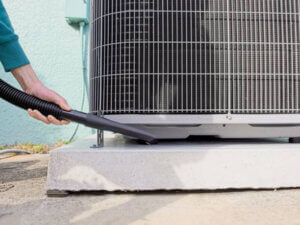
- Attach the extension wand to the shop vacuum and remove the rest of the debris.
- Using the fin comb, straighten the crushed fins on the heat exchanger.
- Remove any large debris (e.g. leaves) trapped between the grille and fins by hand.
- Point a flashlight inside the AC cabinet and examine the fins to check how clean they are.
- Spray the foaming cleaner on the inside of the cabinet. Be careful not to touch the fins as you spray the cleaner through them. Let the cleaner sit for 5-10 minutes.
- Use the garden hose and sprayer attachment to spray water from the inside out.
- Hose the cabinet on the outside to remove the clinging debris. Take care not to direct the debris back into the fins and coils.
- Reassemble the unit and turn the system back on.
Cleaning the evaporator coils
You should also take some steps to clean the evaporator coils. These include:
- Turn off the power to the AC system.
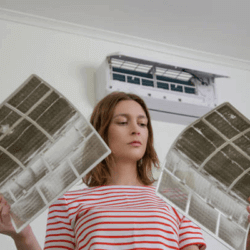
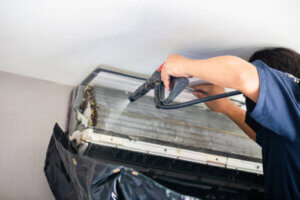
- Locate the evaporator coils. They will be within the indoor AC unit and positioned behind an access door. Remove the screws and open the access door.
- The evaporator coil assembly resembles an "A". The inner section of the assembly is the dirtiest side.
- Using the nylon brush, brush the fins, starting at the top and working downwards. Vacuum the debris.
- Straighten any fins that may have flattened.
- Spray foam cleaner on the inside of the evaporator coil assembly. Let it rest for about five minutes. Rinse off with clean water in a spray bottle. Use the shop vacuum in wet mode to remove excess water.
- Reassemble the system.
Does Cleaning AC Coils Sound Like a lot of Work? Call Galmiche & Sons.
We recommend a once-a-year clean-up, ideally during spring, to prepare your AC for the summer. If you are not sure how to take the steps above, or would rather trust the professionals, our technician can perform your AC tune-up to ensure that your home stays predictably cool and comfortable when the summer heat sets in. As summer brings a flurry of activity for HVAC technicians, we advise you to call us at 314-993-1110 or schedule your appointment as early as possible.
